In order to create automated testing in a Continuous Integration (CI) environment with the objective of creating a Continuous Testing (CT) flow, you will need to familiarize yourself with a series of automation and testing tools. In this post, I?ll look at how to combine and leverage these tools to implement and automate testing in CI and CD.
Before we dive in, just a note that to better understand the rest of this blog post, you should already be familiar with the basics of programming languages and unit tests.
There are lots of tools and techniques that can be integrated into a CI environment. Here at BlazeMeter, we are using Selenium WebDriver Python and we integrate it with Jenkins. The testing framework we are working with is PyTest, which makes it easy to write small tests, yet scales to support complex functional testing for applications and libraries.
Before writing your tests and being able to execute them on a nightly basis, there are several prerequisites which need to take into consideration.
Prepare Your Environment
In order to prepare your environment for testing, you should perform the following steps.
1. Choose Your Browser
We will focus on ChromeDriver as a proof of concept, though there are other desktop browsers available out there such as FirefoxDriver, InternetExplorerDriver, SafariDriver, OperaDriver, and PhantomJS. Download ChromeDriver and store it under the global /bin folder. In our case, it will be /python27/bin.
2. Pick your Programming Language & IDE
We will focus on Python since this is the language we mostly use in BlazeMeter, but you may choose any language you desire as long as WebDriver has bindings to it.
- More info on the languages Selenium WebDriver supports can be found here.
- Additional info on Python can be found here.
The relevant IDE (integrated development environment) for our purposes would be PyCharm.
3. Dive Into Selenium WebDriver
Selenium WebDriver is one of the leading open-source tools for automated testing. Generally speaking, Webdriver is one of the top GUI testing tools there is. If you haven't heard about WebDriver yet, this is your time to deep dive in order to utilize a high-quality automated testing and a stable product. Additional info on WebDriver can be found here.
4. Decide Which Testing Framework You Want
Depending on the programming language that you have chosen, the next step would be to choose the testing framework. We will focus on Py.Test since this is the testing framework with which we are working in BlazeMeter.
Of course, there are many other testing frameworks from which to choose from.
In this post, we will describe tests created via Py.Test, which interprets the test.py file and parses only the functions that contain ?test? in them. Additional info about how to write tests under PyTest convention can be found here.
Create Your Tests
Once you have prepared your environment for automated tests, go ahead and create your first End-to-End (E2E) flow. Keep in mind that your tests should be as quick and short as possible in order to prepare for frequent changes in the code (i.e., log in to your website and verify the URL once signed in).
Make sure to follow the py.test structure to run your tests as expected.
Here is a short example code for a small test using Webdriver Python vs. PyTest:
login_scenario.py

import tests.tests as tests

# Test step 1 - Open URL
def test_open_url(driver, url):
   tests.open_url(driver, url)

# Test step 2 - Add credentials
def test_add_credentials(driver, username, password):
   tests.add_credentials(driver, username, password)

# Test step 3 - Submit form
def test_submit_form(driver):
   tests.submit_form(driver)

# Test step 4 - verify URL
def test_verify_url(driver, url):
   tests.verify_url(driver, url)

Tests.py

from selenium.webdriver.common.by import By

page = "page"
username_el = "username"
password_el = "password"
submit = "//input[@type='submit']"
expected_url = "my/"

def open_url(driver, url):
   driver.get(url)
   driver.find_element(By.ID, page)

def add_field(driver, value, field):
   username_field = driver.find_element(By.NAME, field)
   username_field.clear()
   username_field.send_keys(value)

def add_credentials(driver, username, password):
   add_field(driver, username, username_el)
   add_field(driver, password, password_el)

def submit_form(driver):
   driver.find_element(By.XPATH, submit).click()

def verify_url(driver, url):
   assert (url + expected_url) == driver.current_url

Conftest.py

import pytest
from selenium import webdriver

def pytest_addoption(parser):
   parser.addoption("--driver", action="store", default="chrome", help="Type in browser type")
   parser.addoption("--url", action="store", default="https://qa.moodle.net/", help="url")
   parser.addoption("--username", action="store", default="manager", help="username")
   parser.addoption("--password", action="store", default="test", help="password")

@pytest.fixture(scope="module", autouse=True)
def driver(request):
   browser = request.config.getoption("--driver")
   if browser == 'chrome':
       browser = webdriver.Chrome()
       browser.get("about:blank")
       browser.implicitly_wait(10)
       browser.maximize_window()
       return browser
   else:
       print 'only chrome is supported at the moment'

@pytest.fixture(scope="module")
def username(request):
   return request.config.getoption("--username")

@pytest.fixture(scope="module")
def password(request):
   return request.config.getoption("--password")

@pytest.fixture(scope="module")
def url(request):
   return request.config.getoption("--url")
You can reference the full GitHub test repository here.
Run Your Tests Locally
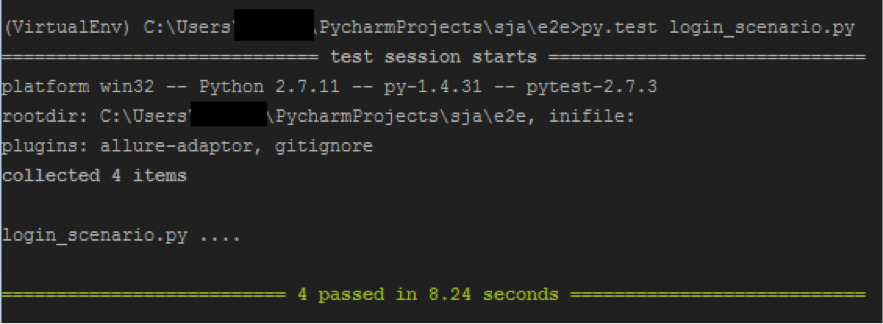
Since we have created the tests under Py.Test convention, the correct way to run them in your local environment would be:
py.test test_name.pyThe results should be something like this:
Run Your Tests via Jenkins
As an extensible automation server, Jenkins can be used as a simple CI server or turned into the Continuous Delivery hub for any project.
NOTE: It is best to run your tests in a pre-configured virtual environment which installs requirements.txt prior to implementing them in Jenkins.
- Create a Virtual Environment - information on how to create a virtual Python environment and its usage can be found here
- Export Project Requirements - Additional information on how to export all relevant installed modules to requirements.txt can be found here.
Install the Allure Reports Plugin to Jenkins
Allure is an open source framework designed to create test execution reports with good representation of the test execution output. The Allure Plugin allows you to automatically generate an Allure Report and attach it to any build during a Jenkins job run. Install the plugin and then let?s start working with Jenkins.
Create a New Jenkins Job
The Jenkins job you are now going to create should include all of the steps mentioned above, including:
- Create virtual environment
- Install requirements.txt
- Activate virtual environment
- Run tests
- Deactivate virtual environment
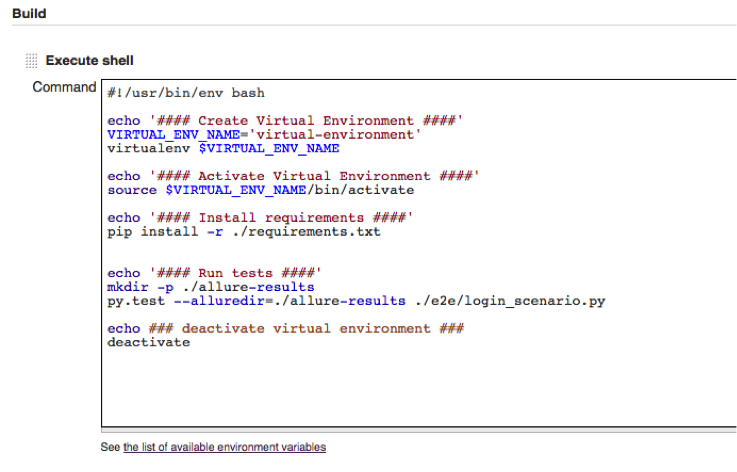
Create a new Jenkins job with the following SHELL script:
#!/bin/bash

echo '#### Create Virtual Environment ####'
VIRTUAL_ENV_NAME='virtual-environment'
virtualenv $VIRTUAL_ENV_NAME

echo '#### Activate Virtual Environment ####'
source $VIRTUAL_ENV_NAME/bin/activate

echo '#### Install requirements ####'
pip install -r ./gui_automation/requirements.txt


echo '#### Run tests ####'
py.test --alluredir=../../allure-results scenarios/login_scenario.py

echo ### deactivate virtual environment ###
deactivate
As seen in the screenshot below:
View Your Test Results in Allure Reports
After successfully integrating your project into Jenkins, the next challenge is to export the test results to a readable user friendly report. Allure allows to inject environment variable and to provide statistics on tests statuses.
It also has the option of embedding images, xml, json, txt, mp4 and many more attachments.
The execution of the py.test suits will be done as follows:
py.test --allure-dir="PATH_TO_DIR" login_scenario.py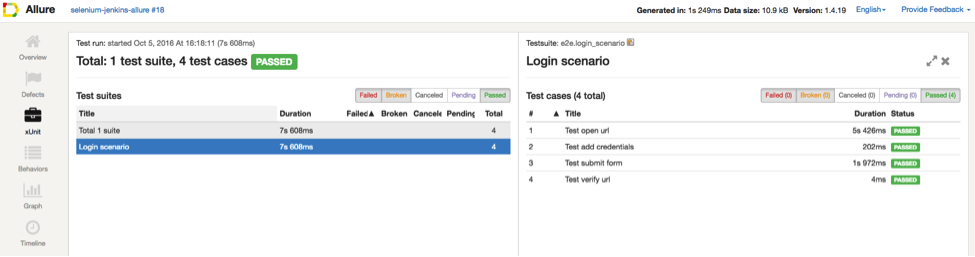
Allure has lots of cool features and parameters which can be embedded into the live report such as screenshots, logs files, and much more.
Schedule Jobs on a Nightly Basis
Be sure to verify that the CI environment is configured to the latest release on a nightly basis. Additional information on how to configure a Jenkins job to run on a specific schedule can be found here.
Congratulations! All of your tests are now configured in Jenkins. All that?s left is to schedule these tests to run automatically on your CI environment which should be with the latest build on a nightly basis.
In the next guide, I will explain how to create a master job in Jenkins that triggers all these jobs that you have created.
Next Steps
I hope that this tutorial assisted you in achieving your goals.
Note: While this post was focused on unit and functional testing, Jenkins - combined with open source tools like Apache JMeter and Taurus, and of course BlazeMeter - is also a great tool for continuous performance testing as well. If you haven?t already, I encourage you to read more about how to run JMeter With Jenkins, running a JMeter test via Jenkins Pipeline, or how to easily automate performance tests in Jenkins.
BlazeMeter is also hosting an upcoming webinar that might be valuable for you - Ensuring Test Maintenance & Productivity in the CI Pipeline.
Do not hesitate to approach me if you have any feedback, questions or other concerns.